How to create your 3D mold blocks for Cool(FEM)?
Last week we talked about Cool vs Cool(FEM) and I appreciate all the great comments. As I mentioned last week, if you want to run Cool(FEM) you first need a 3D mold block.
You can simply import your mold base into Moldflow and mesh all the plates as Mold Block (3D), however, there is an easier way within Moldflow Insight.
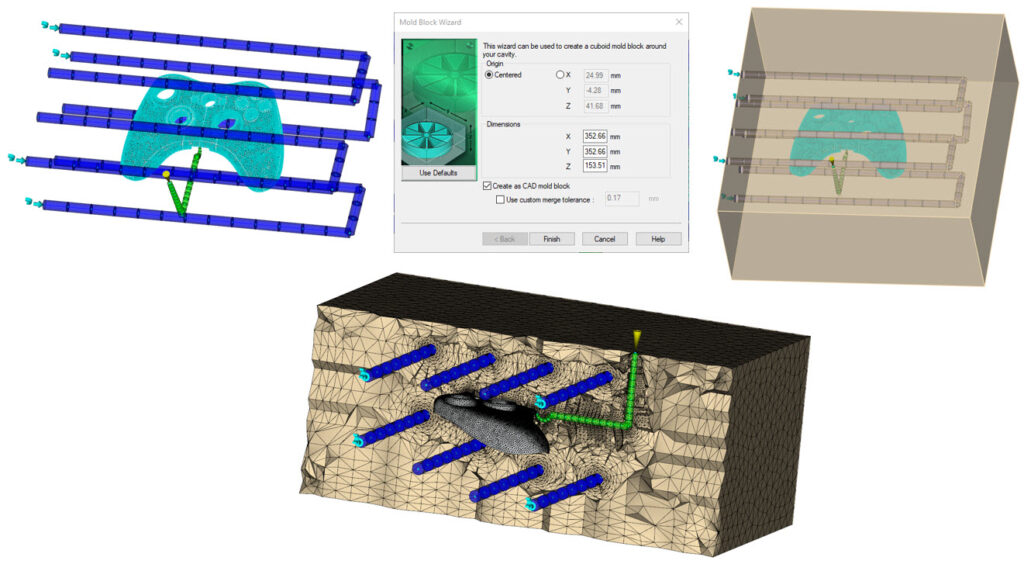
Once you have your part mesh, runner created, and cooling lines modeled – turn all your layers on (Part CAD, nodes, mesh, curves – everything). Switch the analysis sequence to Cool(FEM) then go to Geometry – Create panel – Mold Block. Add your mold dimensions and ensure to check the Create as CAD mold block option. This will generate a CAD model of your mold with your runners, cooling, part, and inserts “cut out” of the mold block.
The final step is to go to Mesh – Mesh panel – Mold mesh and mesh the mold to 3D tetras.
How do you create your 3D mold blocks for Cool(FEM)?