How to use a profiled pack in Moldflow Insight?
Let’s talk about pack profiles – what are they and how should we use them?
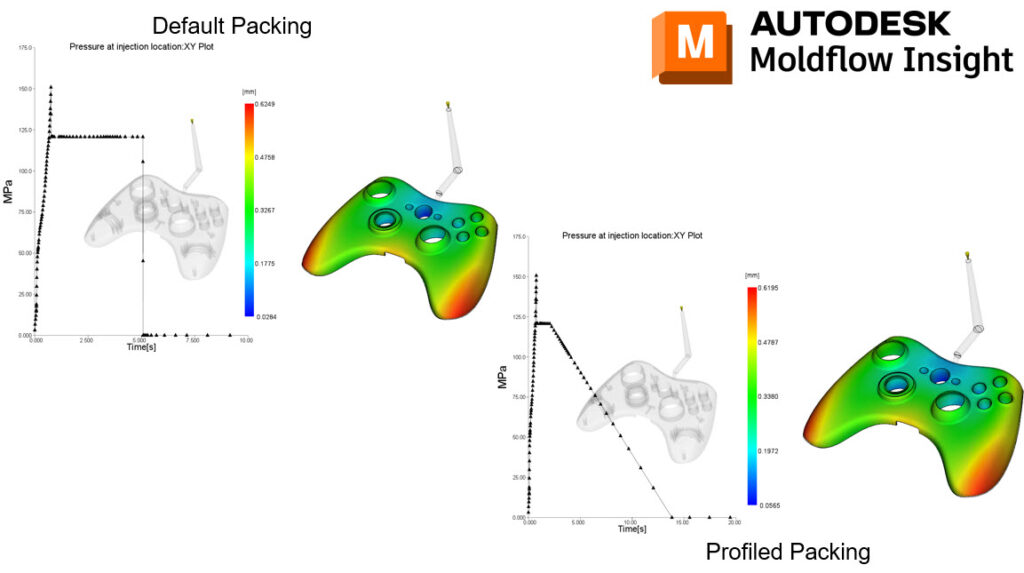
Profiling the pack pressure is basically varying the pack pressure during the packing phase.
If I have a part that is primarily warping due to Differential Shrinkage and I can’t change the part design or gate location, my next simulation will be running a profiled pack.
I first calculate the constant pressure time from my last analyses. I create a Pressure XY plot and pick a node at the end of fill. I average the peak pressure value with the value when the pressure goes to 0 (this average is my transition point time). I then subtract my VP switchover time from the calculated average value (transition point time).
For the Decay time, I subtract that same transition point time from my gate seal time.
Instead of overpacking the gate area, packing profiles can help equalize the volumetric shrinkage at the end of fill vs gate areas, which in turn will reduce warpage. Changing the part design or gate location can normally have a larger impact compared to pack profiles.
Have you ever used a profiled pack in Moldflow Insight?