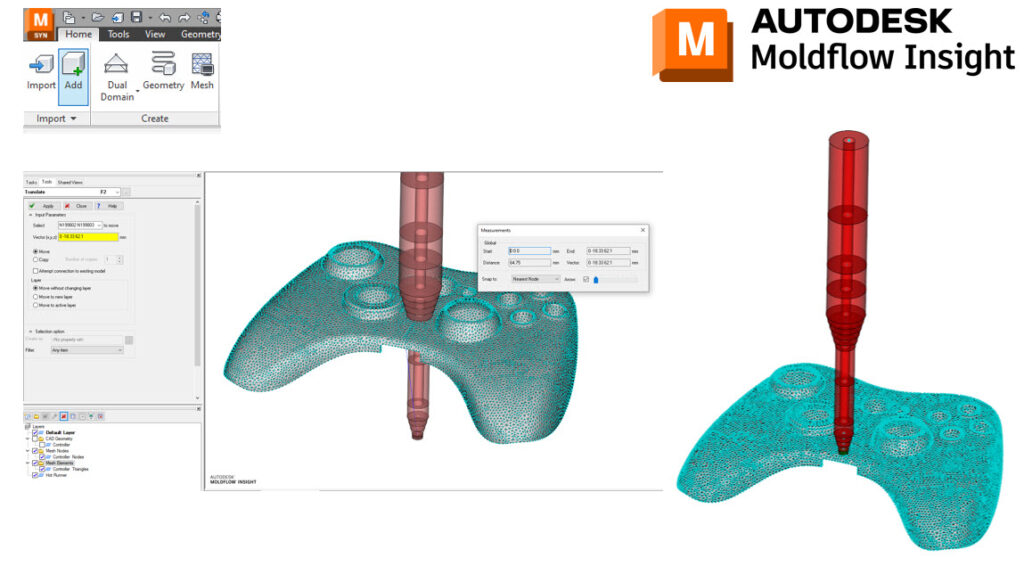
How to use the Add command in Moldflow Insight?
Did you know that you can add a study to a study within Moldflow Insight?
Obviously, the Import command will import new geometry into Synergy. The Add command will allow you to add another study to your existing study. This can be helpful for adding common runner or cooling systems to your existing study.
First, you need to go to the Home tab – Import panel – Add. This will add your study to your existing study but it will align the origin or the 0, 0, 0 locations.
You can use the Move/Translate (Geometry tab – Utilities panel – Move – Translate) command to move the hot runner to your desired location. If you highlight all the nodes/elements you wish to move, then click in the Vector field. By clicking on the bottom node of the hot runner and then the node on the part surface – you can move the runner to the desired location. You can then run a Connectivity diagnostic to check for connectivity and merge nodes (if required).
How do you use the Add command in Moldflow Insight?